

What are the things you still need to do to your website before launching it?
You’ve bought a web domain and created a website – bravo! Before you hit the launch button and spread the news about your new website, make sure you check the following things to give your project the best chance.
Below are some monitoring, optimization and security tips to help your traffic grow and provide the best experience for your website visitors:
- Google Analytics
- Google Search Console
- Cloudflare for security and speed
- SSL certificate for security and visitor trust
- Caching for performance
- Image optimization and compression
- Script minification
- Broken links check
- Canonical link checking
- Backup
Let’s explain each point in more detail:
1. Google Analytics for traffic monitoring on your website
An analytics solution is very easy to add to any website and allows you to monitor traffic on all pages of your site: it records how many visitors you have, where they come from, which sites they came to you from, which pages they visit, how much time they spend on each page and more!
Launching a website without a traffic analytics solution is like driving a car blindfolded: you’re on the road but have no idea where you’re going. You don’t know how your traffic is performing, whether the articles and content you publish are having any effect, or the impact of your advertising campaigns.
Without an analytics solution, you don’t even know if your SEO efforts are having an effect.
One of the most popular and easy to install solutions is Google Analytics – and it’s free!
2. Google Search Console (formerly Webmaster Tools)
Google Search Console allows you to measure your Google search engine performance
If Google Analytics tells you what’s happening with visitors to your site, Google Search Console (formerly Webmaster Tools) tells you where your site ranks in Google in terms of searches. It tells you how many pages on your site Google has indexed, what words visitors find you with, how often you appear in the results, and which pages on your site are the most popular in terms of organic traffic.
Google Search Console also lets you tell Google where to find your sitemap to help it discover and index your site’s pages.
On the technical side, once you authorize and add your site to Google Search Console, you’ll start receiving various notifications and alerts about the “health” of your site, such as when Google encounters errors on your server or if it discovers viruses and malicious code on your site.
It gives you tips to help make your site easier to navigate on mobile devices and shows you which sites are posting links to your site.
Google Search Console can be linked with Google Analytics too, to see more detailed reports right in the traffic analytics interface.
Google Search Console is a very valuable tool and I recommend you take advantage of it.
3. Cloudflare for speed and security
Cloudflare is a company that offers a lot of services geared around website security, content transfer, speed and more.
You can activate Cloudflare on your website for free, without any changes to the site, directly at the DNS level. Once you activate it (takes about 10 minutes), Cloudflare takes over the DNS zone and DNS requests.
In return, you get:
- Protection: Because the DNS zone will be controlled by Cloudflare, your site’s IP address will be hidden and no one will be able to find out your server’s address. Your site will run smoothly because Cloudflare routes traffic to the server without revealing its identity and so bots, malicious people will see the Cloudflare address instead. This way, it protects you from certain attacks that are targeted directly at the server. Cloudflare also protects you from DDoS attacks (a type of attack that overwhelms a server by sending thousands of requests per second).
- Speed: Cloudflare offers free caching for your static content (images, HTML, CSS, Javascript code) directly on their distribution network (CDN). That means you’ll see significant bandwidth savings – because your images and other static content is on Cloudflare servers in many regions around the planet, your visitors will be able to access those resources much faster, from a server close to them, and your server will be free and relaxed. As I write this article, I have more than 50 websites on Cloudflare and most have bandwidth savings of 50% or more. I manage many e-commerce sites and all of them have thousands of product images. The bandwidth savings are huge!
- Security: Cloudflare offers a free domain-wide SSL certificate that renews automatically. All you have to do is activate it in the admin interface and voila! Your site can be accessed with https://. Why is this a good thing? For one thing, your visitors will be more confident seeing that your site is accessed over a secure connection. Then, since 2017, Google has said it will give secure sites more weight in results, and since 2018 even displays a label in the Chrome browser next to sites without SSL: unsecured site. So, being free, you don’t even have to think about it! You don’t even have to install anything on your server!
4. SSL certificate for security (of your website)
As mentioned above, Google has begun to prefer websites that have SSL security certificates, and displays an “unsecured” label in the results pages alongside sites that do not have SSL. It doesn’t look good but it’s also a security risk to carry on without SSL on your site, especially when you can have one for free.
No more excuses in 2019 for not having SSL! And if you don’t migrate to Cloudflare, you can get a free SSL certificate with most hosting companies using free certificates from Let’s Encrypt. You can install them with a few clicks from your host, or if you’re on Windows, for example, you can download a little software that will install it easily.
Of course, no one is stopping you from buying an SSL certificate from an authorized reseller (such as GoDaddy, etc.) and installing it.
Once you have set up the SSL, don’t forget to redirect all pages with the http:// version to the secure https:// version. You usually accomplish this by adding redirect rules on your server or, if you use Cloudflare, check the “Always use https” option in the Crypto section in the Cloudflare interface.
5. Caching for site speed
You can ease the load on your server by taking advantage of the benefits of caching. If your site is built with WordPress, there are many caching modules you can install that can save CPU (Total Cache, WP Rocket, etc.), save your database a lot of queries, etc.
Caching works on many layers, but the basic principle is that the first time a visitor accesses a page that has active caching, the server generates that page by querying the database, generating HTML code and serving the page to the visitor. But at the same time, the caching plugin creates a static copy of the already generated page and stores it on disk (or in server memory). When the page is visited again (by the same visitor or another visitor), the plugin finds the cached page and serves it from there, saving the server from having to work again to generate the page.
This is the basic principle and depending on how complex your pages are, it can make the site look like it’s flying!
This process happens in the background, you only have to worry about the initial setup and the cache is automatically refreshed when you make changes to pages or when they expire.
6. Image optimization and compression
It’s always a good idea to plan and prepare your images early on in the website construction phase – this will save you a lot of time when it’s time to launch your site. You should always upload optimised images, at the right size for the location you are using them in. It’s no good uploading a huge image to the server and web page if you only need it to cover a quarter of the page.
It’s also a good idea to pre-optimize and compress images before uploading them to ensure they have the best size-to-size ratio. There are many plugins for WordPress that will optimise and compress images after you add them to the site, but it’s best when you have an idea where each image will be used, how big it needs to be and upload it at that size from the start.
Images greatly increase the loading time of your website and can consume more server bandwidth than necessary. If your hosting account has a bandwidth limit (amount of data transferred in a month), you can use up bandwidth much faster with just a few too many images, depending on how much traffic your site receives.
If you use mostly JPEG images, which is a compressed (lossy) format, we have determined that by adjusting the compression/quality very slightly, you can achieve significant bandwidth savings.
I recently studied this size vs. quality ratio on a few e-commerce sites I’ve created and found good value for product images (which on some sites can number in the thousands).
See below the difference in file size when varying image compression (quality), from 90 (default), to 70 and then to 50.
Although the picture size was very small on the products, the value of 50 resulted in images of too poor visual quality and so I increased it to 70. But even at 70 quality, the bandwidth consumed by the images dropped by almost half! If you multiply that by thousands of products, the savings made and the difference in page load time is enormous.
As you can see below, once you go to 70 quality, the image size increases dramatically. And for the quality jump from 50 to 90, the image file size more than doubles!
| Size at quality 90 (in KB) | Size at quality 70 (in KB) | Size at quality 50 (in KB) |
| 35.6 | 20.0 | 15.0 |
| 34.4 | 19.3 | 14.5 |
| 35.8 | 20.1 | 15.0 |
| 24.7 | 13.3 | 9.9 |
| 37.3 | 22.0 | 16.9 |
| 27.4 | 15.3 | 11.5 |
| 27.1 | 15.2 | 11.4 |
| 61.2 | 34.9 | 26.3 |
| Total: 283.5 | Total: 160.1 | Total: 120.5 |
7. Minimization to reduce script size
Minimisation is the process of reducing the size of the script files (Javascript, CSS stylesheets) that your website needs so that they load faster.
You may have CSS files (for styling) or Javascript files (for adding animation or dynamic functionality and interaction). When you work on the site, these scripts usually have nicely arranged code with indents, tabs, spaces, multiple lines, long variable names to make it easier to edit, but browsers don’t need these to interpret the files correctly and display the page.
By minimizing, you can automatically remove these spaces, tabs, empty lines, replace variable names with short ones without affecting functionality. This minimization process can make files much smaller and consequently faster to load.
For efficiency, this minimization process can take place on the server (there are plugins for WordPress for minimization), but it can also be done in the program/platform you use when developing the site. If your site has Cloudflare, it can minify files directly from the server, at the time of access, without you having to do anything.
Minimizing scripts gives score boosts when tests like Google Page Speed, GTMetrix or YSlow analyze your site. Google also uses site loading speed when determining how well your site should rank in search results pages. A site that loads quickly is well seen by Google and your visitors will be delighted.
Here’s an example of the setup in Cloudflare that automatically minimizes static files on your site:

8. Check for broken links
Sometimes I get disorganized when working on the site. I create most pages as drafts, blank, and then rework them and put content on them. I often leave temporary links in the content that go nowhere, with the intention of coming back later and replacing them before the site launches. But sometimes I forget and can end up with broken links on the site.
Other times, I don’t get all the content from clients and create blank pages with temporary links, just so I can get on with my business. Of course, often the client changes their mind or I forget about them.
Regardless of the reason, every website can have broken links and missing pages. It doesn’t look good on first impressions and it’s not a good idea to leave them that way, from the point of view of visitor experience but also search engine rankings.
That’s why, before launching (and at regular intervals after launch), I check my website for broken links. You can do it manually if you don’t have many pages, but you can accidentally omit some links.
It’s best to use a software tool called a “crawler” – software that will visit the main page of the site, identify all the links on that page, then visit each link and do the same on each one until it exhausts all the pages and links. After scanning the entire site, it gives you a report of the results and lets you know if you have any broken links so you can fix them.
My favorite tools for checking if you have broken links are:
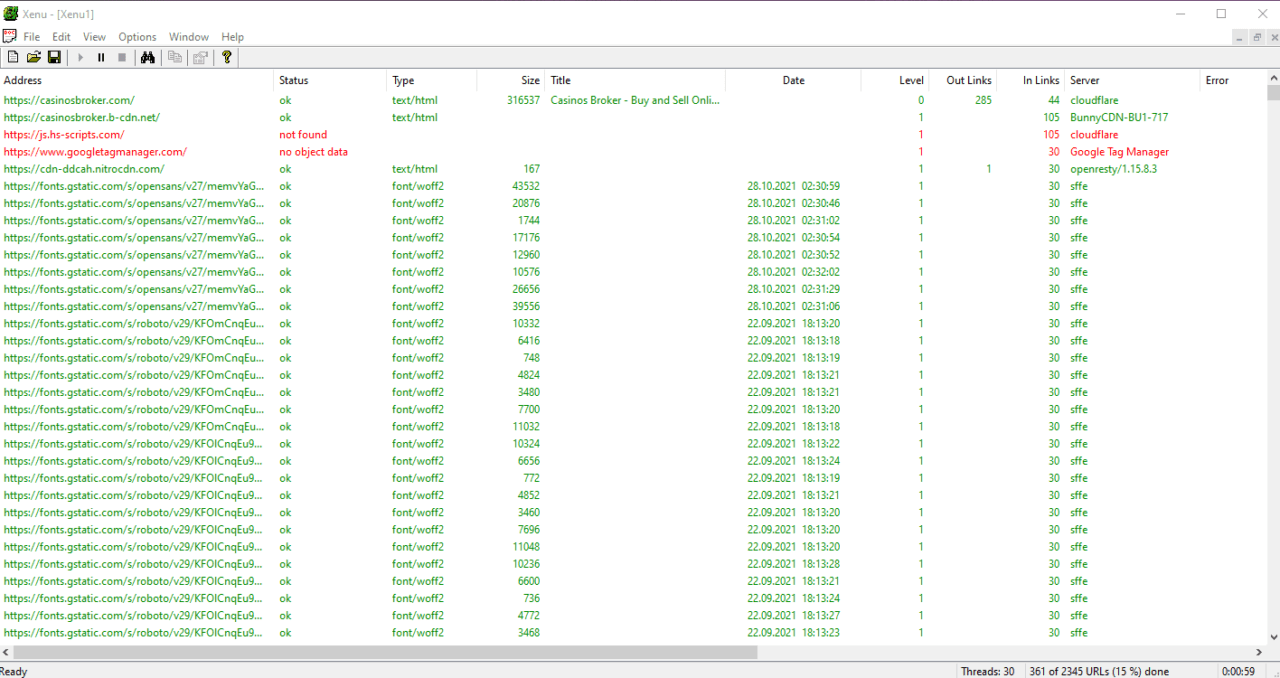
- Xenu Link Sleuth – a free Windows program that will check any link on your website – not just pages, but images, frames, plugins, backgrounds, stylesheets and so on. It generates real-time reports as it scans, and at the end, you can save the report or email it. It also works on https secured sites. The program is very small and works on all versions of Windows from 95 onwards.
- Screaming Frog – an online tool that offers more than just checking for broken links. The free version scans up to 500 URLs (which may even be enough if you don’t have a large website). It also helps you with some search engine optimization tips and tools, such as identifying duplicate content, analyzing meta and title tags, generating XML sitemaps and more.
Here is an example of a report generated from Xenu Link Sleuth:
9. Check canonical URLs
If you have a page on your site that can be accessed with more than one URL, or if you have different pages with different URLs but identical content, you have “duplicate content”. Search engines also identify this content and this can negatively affect your site’s performance in search engines.
For example, let’s say you have a contact page, accessible at the following address:
http://www.mysiteexample.com/contact
And the same page at:
http://mysiteexample.com/contact
You might say: but it’s the same address! It’s the same page!
Yes, it is indeed the same page, but you can access it at the domain version with “www” and without “www”. For Google, this is a duplicate page. “WWW” is just a subdomain and is considered a different address.
If you don’t tell Google exactly which is the preferred (canonical or official) version of your pages, Google will choose for itself, considering one “canonical” and ignoring the other, or worse, considering both of equal importance. In this case, the SEO “value” that the canonical page would receive splits in two – to each version one side at a time. This leads to the page’s importance being diminished because of the different links, ending up with your pages competing with themselves.
This is where the “canonical” link comes in handy – even if your site has multiple pages with the same content, accessible at different URLs, you can specify in the <head> section of the pages which version you prefer (the “canonical” version), like this:
<link rel=”canonical” href=”http://mysiteexample.com/contact” />
This tag is sufficient to indicate to search engines that you prefer the page to consider the version without the “www” as “official”.
In addition, if you have Google Search Console set up, you should also go there and specify which version you prefer so that the reports received there are for the appropriate version.
You can read more here about canonical URLs and other topics related to improving your site and making it as easy as possible for search engines to index and understand.
If you use WordPress on your site, a great tool for search engine optimization aspects is the Yoast plugin, which in addition to the optimization functions, article analysis, keyword analysis and so on, automatically generates these canonical URLs on all pages.
10. Website Backup
All the work you put into your website can go down the drain if you don’t have a backup solution set up. You’ve uploaded the images, created the pages, set up the plugins and later some hacker gains access to it, the server crashes or you break something yourself – if you don’t have a recent backup, you’ve got a night or two to lose, or you risk not recovering anything!
That’s why it’s recommended that you have a backup before you launch the site. It’s good to have this right from the build phase.
Almost every hosting company offers one backup solution or another, either included in the price or for an additional cost, depending on the subscription you have. Also, depending on the company and how much you pay, the frequency with which these site backups are done differs – daily, every few hours, or weekly.
It’s still a good idea to have your own copy somewhere. You can back up your site via FTP, or using various backup tools such as Syncback SE or Syncback Pro (which I’ve used for years on all my projects).
If your site is built with WordPress, a very good backup solution is to make a free account on the ManageWP platform. Once you connect your site to ManageWP, you can set up free (monthly) or daily (for a fee) backups. Depending on your site and how often you update content, one backup per month may not be enough.
From ManageWP you can restore your site automatically, either to the same host you had the first time, or to another host if you want to change hosting company.
As a service for professionals with multiple sites, ManageWP also has other features such as centralised control of updates, comments, module installation and more.
Another backup solution I use is automatic backup to Amazon S3 (you can use Syncback for that), or to another FTP server. There are many plugins for wordpress that will backup your site to services like Dropbox, Google Drive, OneDrive, etc.
It’s important to remember, however, that for security and efficiency, site backup should be done frequently (at least daily) and in a separate location from where the site itself is hosted.
Personally, I prefer backup to Amazon S3, using Syncback Pro. I can configure the backup to run daily, differentially (only the changes are backed up, not the whole site). And if it’s a very important site and I want the flexibility to roll back to older versions, I can set up 7 backups – one for each day of the week. In this variant, if something undesirable happens and I don’t realise immediately (maybe the site was infected and I didn’t notice, and the backup also stored the malicious script), I can go back a few days.
For all my clients, I have daily, full, database backups. I can go back to the version from a few months ago if I want. Large companies even store years of backups of websites and databases. It all depends on how important the data is and how much flexibility you want to have when retrieving data.
Bonus: Set up your newsletter subscription
This last tip is more in the area of marketing or strategy than technical. If you’re launching a website for any reason other than pictures of cats, you should get serious about building a mailing list.
Many website owners (myself included), regret not starting earlier to collect email addresses from potential customers and site visitors. Some do it before the site is launched.
If you start building an email list now, you’ll slowly build YOUR audience – people who are interested in YOUR content, YOUR updates and what YOU have to offer. Personal contact with your fans is very effective.
Without being boring and intrusive, you can send updates, valuable content, tips, ideas and, why not, promotions and make sales directly via email to customers who have willingly subscribed to your email list.
A quick way to start building an email list is to sign up with an email service or ESP (Email Service Provider) (there are some free, some paid), enter a subscription form on the website, and voila!
Conclusion
There are many other things you can do to make your website have maximum impact at launch, but the ones described in this article are among the most important and relatively easy to implement.
I recommend you don’t leave them unimplemented 6 months after launch! It shouldn’t take you more than 2 hours to go through all the steps and implement them. You’ll be glad you did.

licensing insights, and M&A deal flow — straight to your feed.